RockRecorder records Mindshare radio channels from the multicast audio Mindshare sends on your network. Each recording gets the radio's alias and ID, and emergencies and GPS positions when the radio sends them.
You need to be a SuperAdmin, and the server needs the MRadio license (shown under Administration > License).
Recording Mindshare console phone lines? See Connecting Mindshare phone lines.
Before you start
- Mindshare sends each channel as multicast RTP to a multicast group, on a TX port and an RX port. You'll need those three values for each channel. You can also import them from Mindshare's
.configfile. - The RockRecorder server needs a network card on that network. The switches have to deliver the multicast groups to it (IGMP). A network card used only for recording is best.
1. Add the recording interface
- Open the user menu (top right) and go to Administration > Recording > Recording Interfaces.
- Click Add recording interface.
- Fill in:
- Interface Name: for example MRadio 1.
- Recorder Type: MRadio.
- Network Interface (NIC): the network card on the Mindshare network.
- Click Create Recording Interface.
2. Add the channels
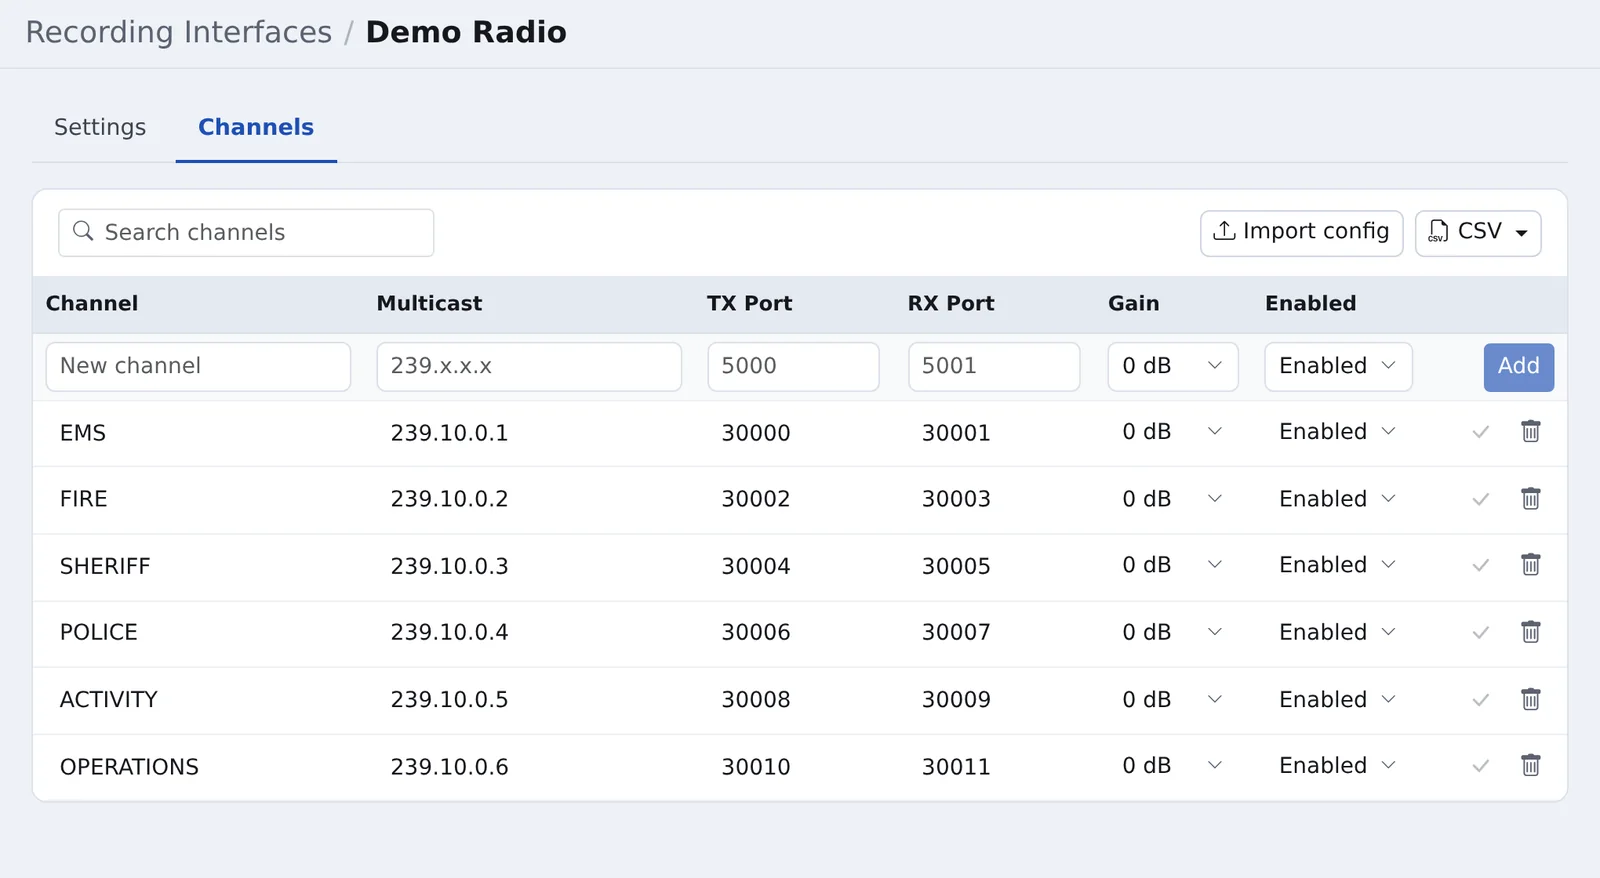
On the interface's Channels tab, either:
- Type them in: fill in the empty top row (Channel, Multicast, TX Port, RX Port) and click Add.
- Import from Mindshare: click Import config and choose the Mindshare
.configfile. Enabled group lines with an address and ports are added. Channels that already exist are skipped. - Import a CSV: use CSV > Download template, fill it in (
channel,multicast,txport,rxport,gain_db,enabled), then CSV > Import from CSV….
| Field | Allowed values |
|---|---|
| Multicast | 224.0.0.0 to 239.255.255.255 |
| TX Port / RX Port | 1 to 65535. They must differ, and no other channel can use them |
| Gain | -20 to +20 dB; 0 is normal |
Transmissions and receptions are saved as separate recordings.
3. Apply
Click Apply at the top of the interface page. Until you do, the changes are saved but not recording, and the list shows Not applied.
4. Check it's working
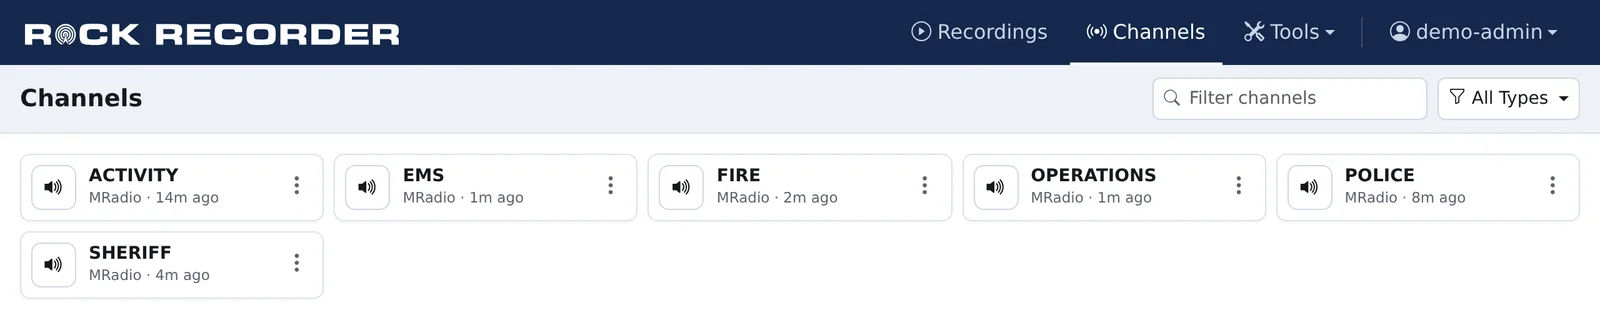
- Channels page: each channel shows Active while someone talks, then when its last recording was ("5m ago").
 - Recordings page: new recordings appear with their Alias and UID (radio ID).
- No recordings? See A channel has no recordings.
- Recordings page: new recordings appear with their Alias and UID (radio ID).
- No recordings? See A channel has no recordings.
Radio aliases
A radio usually sends its alias with each transmission. To use your own names instead, go to Administration > Alias Banks > MRadio, add Radio ID and Alias pairs (or import a CSV), and click Apply. An alias bank entry wins over what the radio sends, on new recordings.
On the interface's Settings tab, Remember radio aliases fills in the last alias seen for a radio when a transmission arrives without one.
Emergencies and GPS
- Recordings made during an emergency get a red badge. Emergency only on the Recordings page's Search tab finds them.
- Tools > Emergencies lists each emergency once, with the radio, channel and its recordings.
- Recordings that report a position get a pin that opens the map.
- To be emailed when an emergency starts, add an alert under Administration > Notifications > Emergency Alerts.